A circle on a drawing looks simple. At installation, it becomes a drilled edge, a fastener, a washer and a small area carrying pressure.
INSTALLATION DETAIL / HOLE 01
Draw the material around the hole
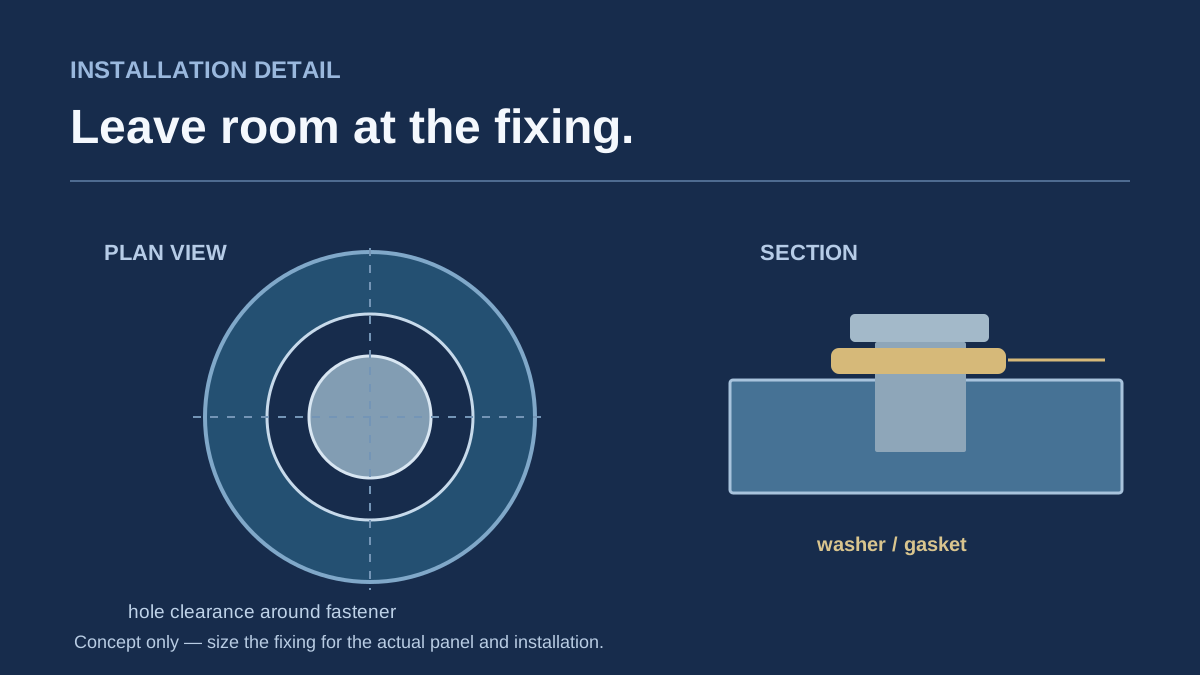
Drilling needs suitable tooling and support. An edge too close to a hole, a damaged bore or a sharp internal corner can concentrate stress. The fabricator should set hole size and edge distance for the actual grade, thickness and load—not copy a convenient dimension from another panel.
Acrylic also moves as temperature changes. On a larger panel, hard-clamping every fixing point can leave little room for that movement. Clearance and suitable washers or gaskets belong in the detail.
BEFORE THE INSTALLER ARRIVES
Trial-fit the whole fixing
Panel size, hole positions, substrate, hardware and any allowed movement.
A representative drilled panel using the proposed tool and support method.
The approved washer, gasket and tightening method—not a substitute chosen on site.
A small indoor sign and a large exposed panel do not deserve the same level of mounting review. Agree on the actual use before anyone drills the production batch.