A three-tier display: where the artwork changed the build.
We compared bonded panels and heat-bent sections for a retail shelf brief, linking the construction choice to decorated surfaces and the assembly location.
Three shelves.
More than one way to make them.
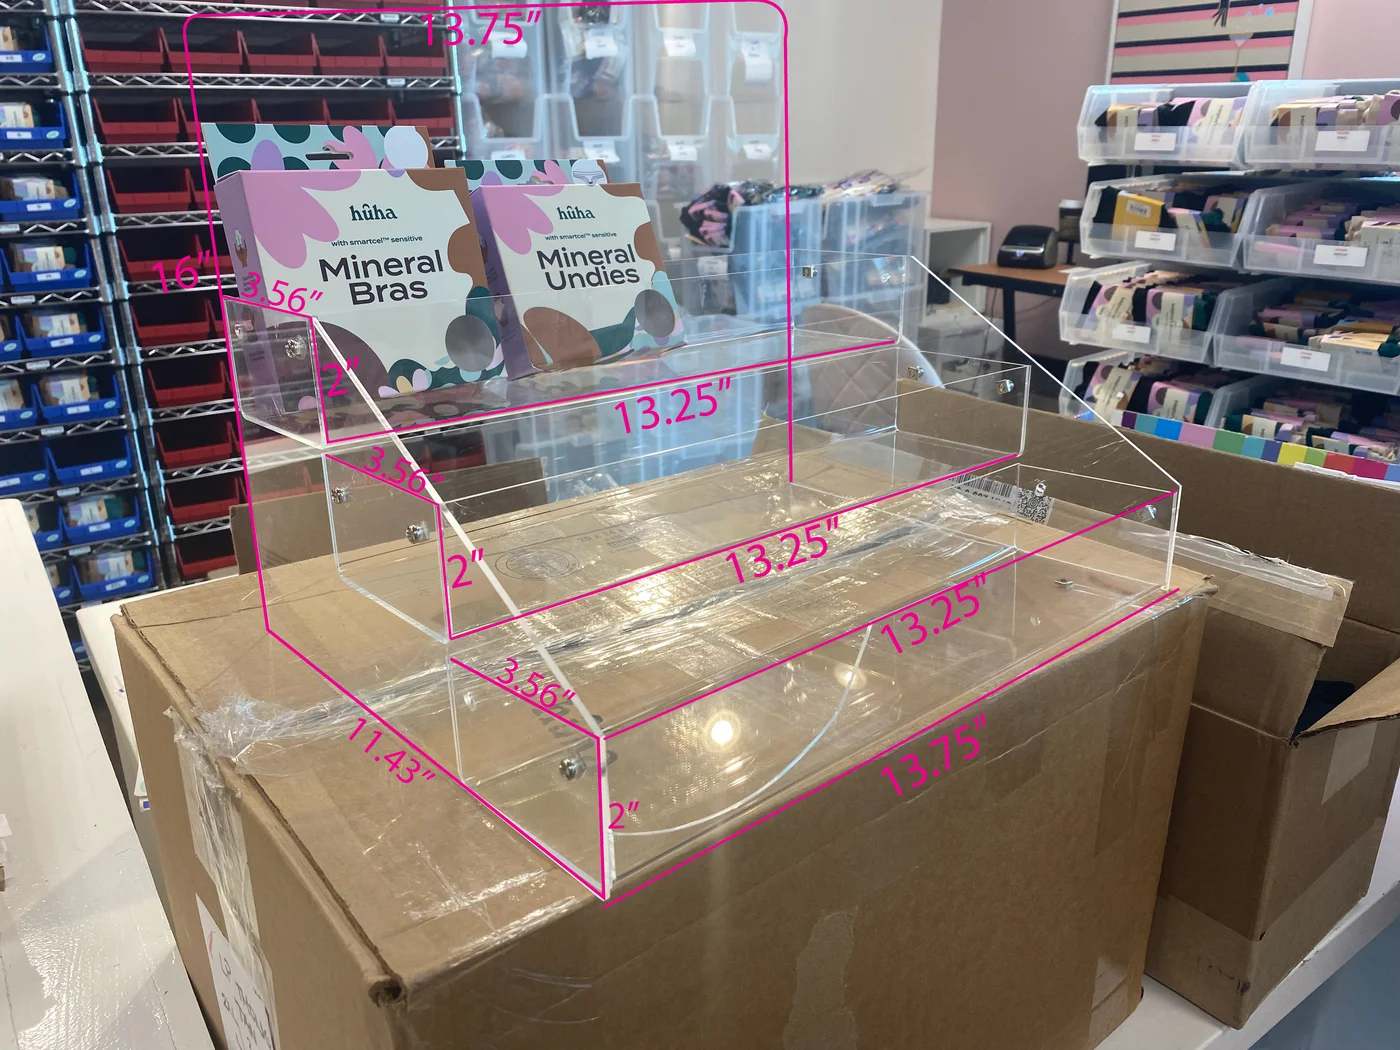
A buyer asked us to quote 75 acrylic counter displays with three shelf levels in April 2022. The reference specified a 13.75 × 16 inch backer and inner shelf dimensions of 13.25 × 3.56 × 2 inches. The inquiry also asked whether 6 mm acrylic was the right choice.
We proposed 5 mm for the quoted version and asked how the display should be assembled. In October, the buyer returned with larger dimensions, revised artwork and a request for a pre-production sample reviewed through photos and video.
The first photograph was a starting reference. Its April measurements should not be mistaken for the final October design.
How the specification was decided
| Decision | What the project record shows |
|---|---|
| Shelf layout | The original request covered 75 three-tier displays and asked about 6 mm acrylic. We proposed 5 mm for that quote, before dimensions changed. |
| Decorating access | Separate panels could take stickers before bonding, including the steps. The proposed bent version restricted access at the steps. |
| Assembly and stage | Flat packing for assembly in Canada was proposed. The final email records a decision still pending on the fabrication route. |
Compare tiered display stand formats by shelf footprint, then use the acrylic forming guide to clarify which faces must remain accessible for graphics.
Which surfaces needed artwork?
We sent two annotated layouts to explain a project-specific tradeoff. The issue was access to the stepped surfaces in the proposed decorating process.
Bonded panels
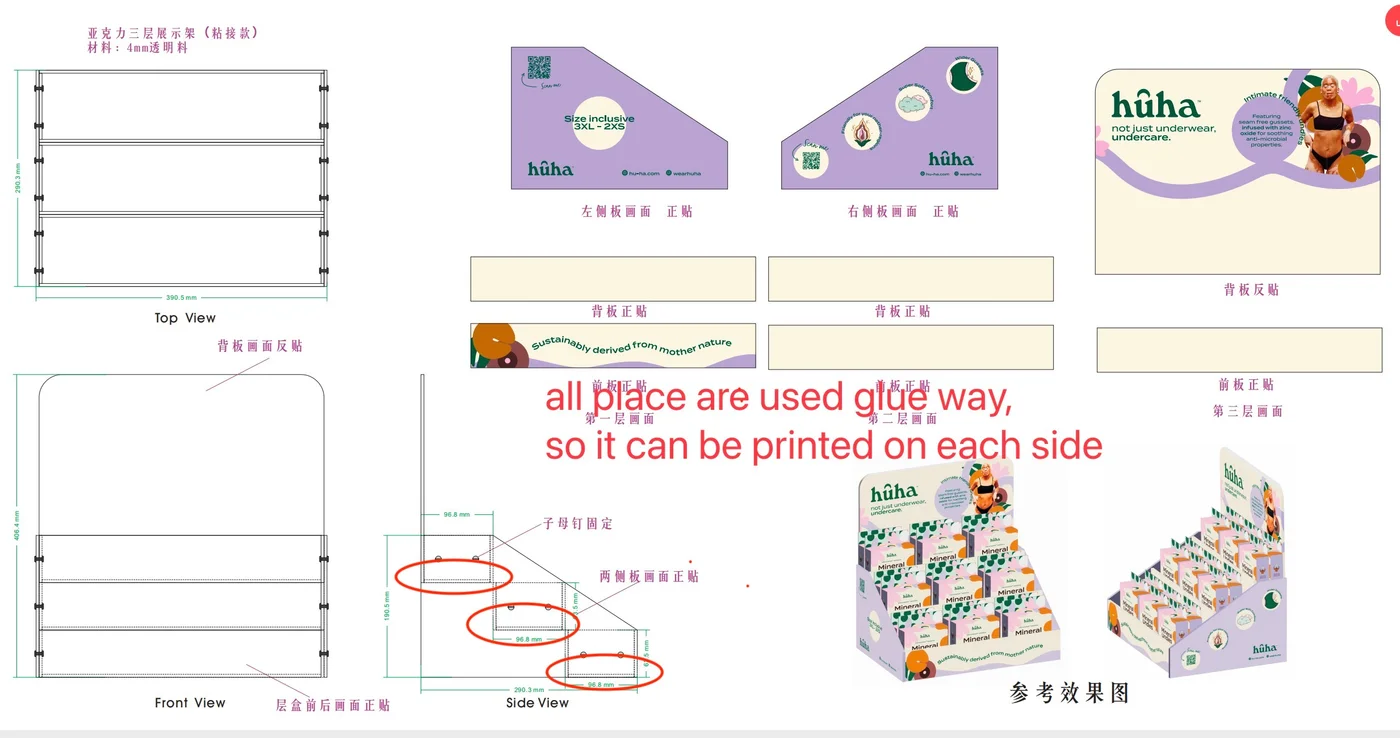
We explained that separate panels could be decorated before bonding, including the steps. We also noted the extra sticker work and associated cost.
Heat-bent sections
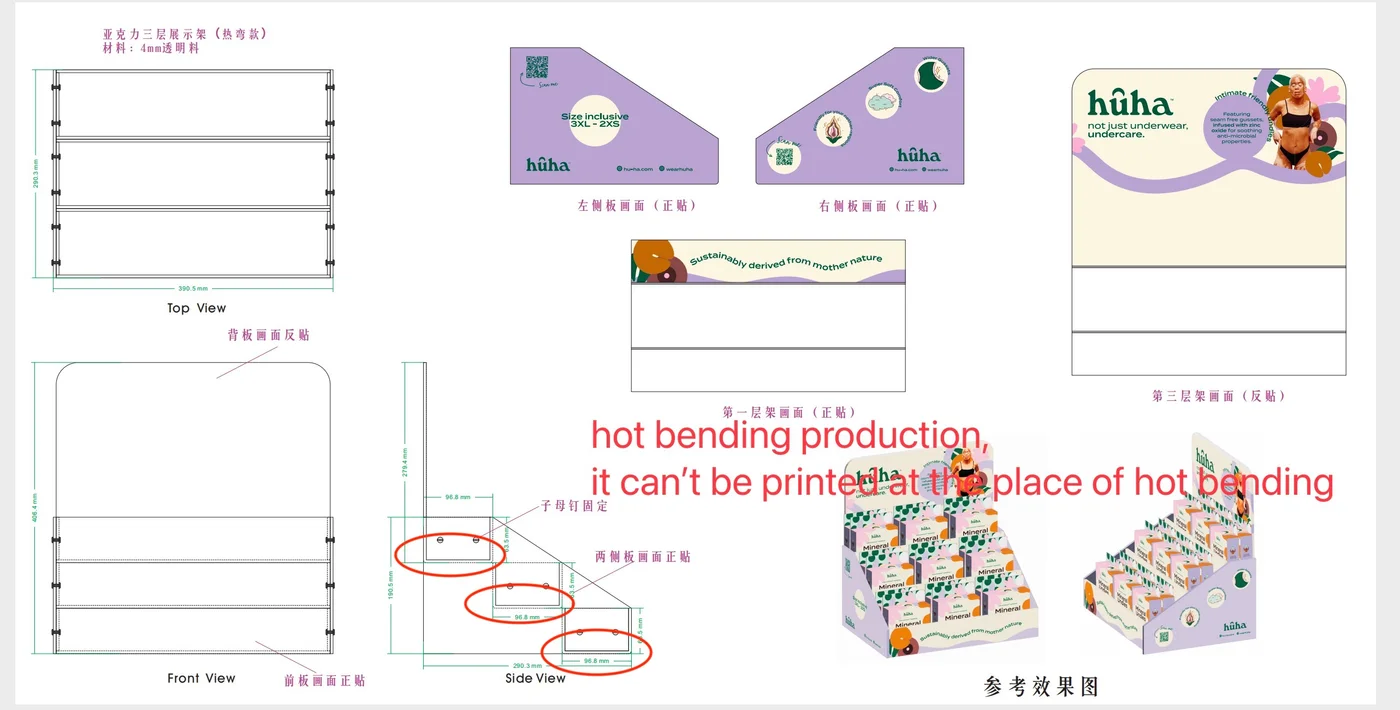
For this proposed production route, we described decoration on the front, back and sides, with restrictions at the steps. This was a constraint of the proposal, rather than a claim about every bending process.
Stickers were part of the quote.
We clarified that the quoted graphics were applied stickers, rather than direct UV printing. The buyer had asked to include the artwork on the sample, so the decorating method needed to be explicit before the build was chosen.
Explore acrylic forming methodsWhere would it be assembled?
We recommended sending the display in parts with an individual inner box for each stand, then assembling it in Canada. We explained the potential packing-volume and breakage benefits, while leaving the actual freight saving to be confirmed after packing.
The construction decision was still with the client.
On 12 October, the buyer said the client had yet to choose a method. The record includes a sample request followed by the fabrication review. It does not establish a completed sample or a production delivery.
For a similar display, the practical first step is to map the artwork onto every intended surface, then settle construction, decoration and assembly together.
What to prepare for a similar display
- Problem to solve
- Plan artwork and access on a three-tier counter display without committing to a build before the decoration is reviewed.
- Structures to compare
- Compare separately decorated bonded panels with heat-bent sections. For this quote, access for applying graphics to the steps differed between the two routes.
- What to confirm
- Confirm the revised shelf dimensions, artwork on each face, decoration method and where the display is assembled. The project record stops before a method was selected.
- What to send for a quote
- Send a labelled artwork map, shelf drawing and units, merchandise dimensions and weight, quantity by design, assembly location and packing requirements.